Garlic is a cornerstone of countless cuisines worldwide, celebrated for its pungent aroma and robust flavor. Few ingredients offer such a profound impact on a dish, transforming bland into brilliant. However, keeping a steady supply of fresh, potent garlic through the colder months can be a challenge. That familiar sight of a shriveled, sprouted, or moldy bulb can be disheartening, especially when you've stocked up anticipating a winter full of flavorful meals. The good news is, with a little knowledge and preparation, you can enjoy the deliciousness of garlic long after the harvest season has ended. This article will delve into the top tips and methods for preserving garlic for winter, ensuring your culinary adventures are never limited by a lack of this essential allium.
Why Preserving Garlic for Winter Matters
The ability to preserve garlic for winter is more than just a convenient trick; it's a culinary game-changer. Imagine having access to fresh-tasting garlic for your soups, stews, roasts, and stir-fries, even when fresh bulbs aren't readily available or are at peak market price. Beyond the sheer availability, preserving your own garlic often means you're using higher-quality, often locally sourced, bulbs that haven't traveled thousands of miles. This translates to superior flavor and potency in your cooking. Furthermore, learning how to properly store and preserve garlic helps reduce food waste, ensuring that every precious bulb you buy or grow contributes to delicious meals rather than ending up in the compost bin. It empowers you to manage your pantry efficiently and embrace seasonal eating with year-round access to a beloved staple.
The Foundation: Starting with Quality Garlic
The success of any garlic preservation method hinges entirely on the quality of the garlic you start with. You can't turn a bad bulb into a good one, no matter how clever your preservation technique. Therefore, selecting and, if you grow your own, properly curing your garlic is the critical first step in ensuring long-term freshness.
Choosing the Right Bulbs
- Firmness and Intact Wrappers: Always choose garlic bulbs that are firm to the touch, with no soft spots or signs of bruising. The papery outer wrappers should be intact and dry, protecting the individual cloves. Avoid any bulbs that show signs of mold, sprouting, or damage.
- Hardneck vs. Softneck: Generally, softneck garlic varieties (like Silverskin or Artichoke) tend to store longer than hardneck varieties (like Rocambole or Porcelain). Softnecks have multiple layers of wrappers, which provide better protection against moisture loss and pests. However, hardnecks, with their larger, easier-to-peel cloves, can also be stored effectively if cured and kept in ideal conditions.
- Source Locally: Whenever possible, purchase garlic from local farmers' markets or direct from growers. This often means you're getting fresher, higher-quality bulbs that haven't been subjected to long-distance travel or questionable storage conditions.
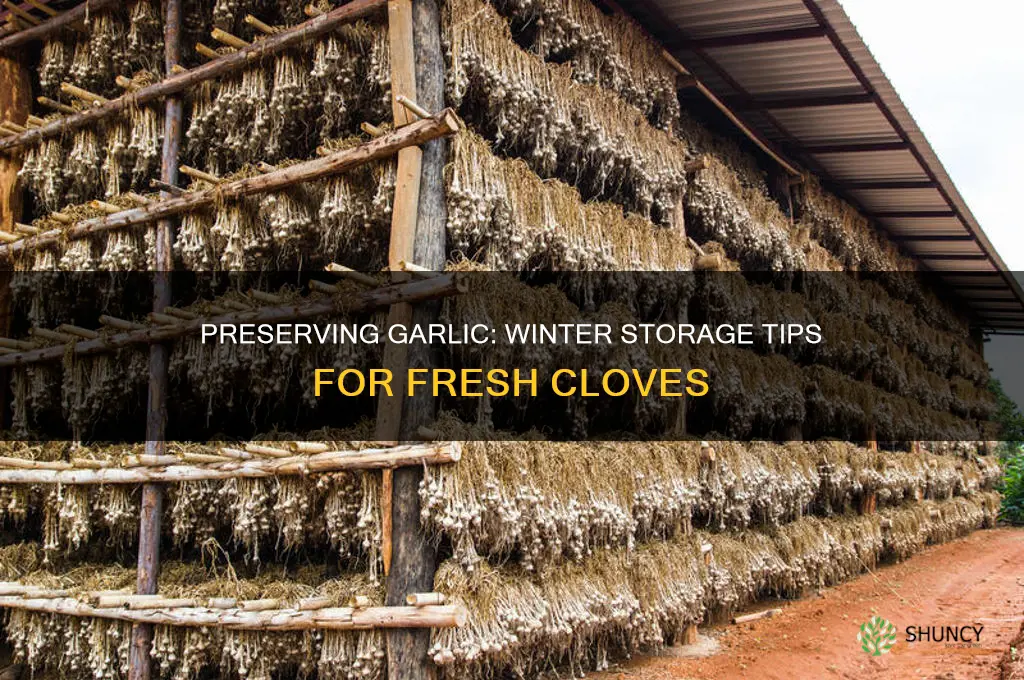
Curing Your Garlic Properly
If you're harvesting your own garlic, proper curing is non-negotiable for long-term storage. Curing dries out the outer wrappers and necks, preventing rot and extending shelf life significantly. This process essentially toughens the garlic up for its long winter nap.
- The Process: After harvesting, keep the stalks and roots attached. Hang the garlic in braids or bundles in a warm (75-85°F / 24-29°C), dark, dry place with excellent air circulation. Good air circulation is key to preventing mold.
- Duration: Curing typically takes 2-4 weeks, depending on humidity and temperature. You'll know it's done when the wrappers are completely dry and papery, the neck is constricted and dry, and the roots are brittle.
- Post-Curing: Once cured, trim the roots to about 1/2 inch and cut the stalks (if not braided) about 1 inch above the bulb. Remove any loose or dirty outer wrappers, but leave as many intact as possible for protection.
Top Methods for Preserving Garlic All Winter Long
Once you have your high-quality, cured garlic, it’s time to choose the best preservation method for your needs. Different techniques offer varying levels of convenience, shelf life, and culinary applications.
Traditional Storage: Cool, Dark, and Dry
For whole bulbs, the simplest and often most effective method is proper traditional storage. This method is ideal for softneck varieties, but can also work for hardnecks if conditions are right.
- Ideal Conditions: Garlic thrives in temperatures between 50-65°F (10-18°C) with moderate humidity (around 60-70%). Crucially, it needs to be stored in a dark place to prevent sprouting.
- Containers: Use breathable containers such as mesh bags, paper bags, open baskets, or even old nylon stockings. These allow for essential air circulation, preventing moisture buildup and mold. Avoid airtight containers, plastic bags, or direct sunlight.
- What to Avoid: Resist the urge to store whole bulbs in the refrigerator. While it seems logical, the cool, humid environment can actually trigger sprouting and accelerate spoilage, or cause the garlic to go moldy quickly.
- Monitoring: Periodically check your stored garlic for any signs of softening, sprouting, or mold. Remove and use or discard any compromised bulbs immediately to prevent the spread to others.
For a deeper dive into optimal conditions and troubleshooting, explore our Ultimate Guide: Preserving Garlic for Winter Storage.
Freezing Garlic: Cloves, Puree, or Oil-Covered
Freezing is an excellent long-term solution for peeled garlic, offering incredible convenience for busy cooks.
- Whole Peeled Cloves: Peel individual cloves, then spread them in a single layer on a baking sheet and freeze until solid. Transfer the frozen cloves to freezer-safe bags or containers. They can be chopped or grated directly from the freezer.
- Garlic Puree/Paste: Process peeled garlic cloves in a food processor with a small amount of olive oil (enough to create a paste, about 1 tablespoon per cup of garlic). Spoon the paste into ice cube trays and freeze. Once solid, transfer the cubes to a freezer bag. This is incredibly handy for quickly adding garlic to dishes.
- Oil-Covered Cloves (Safe Freezing Method): Pack peeled garlic cloves into small, freezer-safe jars or containers, then cover them completely with olive oil. Ensure the oil completely submerges the garlic. Freeze immediately. The oil will congeal, protecting the garlic. Remember, never store garlic in oil at room temperature due to the risk of botulism. Only freeze or refrigerate (for very short term) oil-packed garlic.
Frozen garlic can last for many months, making it a fantastic way of preserving garlic for winter and beyond.
Dehydrating Garlic: Flakes and Powder
Dehydrated garlic offers a lightweight, shelf-stable option that takes up minimal space. It's perfect for making your own garlic powder or flakes.
- Preparation: Peel and thinly slice garlic cloves (about 1/8-inch thick). For garlic powder, you'll want to aim for thinner slices or even mince it before drying.
- Dehydrator Method: Arrange slices in a single layer on dehydrator trays. Set the dehydrator to a low temperature (around 125°F / 52°C) and dry until the garlic is brittle and snaps easily, usually 6-12 hours.
- Oven Method: For those without a dehydrator, arrange slices on parchment-lined baking sheets. Bake at the lowest possible temperature (e.g., 150-170°F / 65-77°C) with the oven door slightly ajar to allow moisture to escape. This can take several hours, so monitor closely.
- Storage: Once completely dry and cooled, store garlic flakes in airtight containers. To make powder, grind the flakes in a spice grinder or coffee grinder until fine. Store the powder in airtight jars in a cool, dark pantry.
Pickling Garlic: A Flavorful Alternative
Pickled garlic is not only a fantastic way to preserve it but also transforms its flavor, making it a delightful snack or ingredient for salads and antipasto platters. The acidity of the brine makes it safe for room-temperature storage once processed.
- The Process: Garlic cloves are peeled and typically blanched briefly before being packed into sterilized jars and covered with a hot, acidic brine (vinegar, water, salt, and optional spices). Ensure the recipe you follow is tested and safe for home canning.
- Flavor Profile: Pickled garlic loses some of its raw pungency, becoming milder, sweeter, and tangier.
- Uses: Enjoy pickled cloves straight from the jar, chop them into salads, add them to marinades, or use the flavorful brine in vinaigrettes.
Fermenting Garlic: Adding a Probiotic Boost
Fermentation is another ancient preservation method that introduces beneficial probiotics and a unique tangy flavor to garlic.
- Simple Brine Fermentation: Peel garlic cloves and pack them into a clean jar. Cover with a 2-3% salt brine (e.g., 1-2 tablespoons non-iodized salt per quart of non-chlorinated water). Ensure the garlic is submerged (a fermentation weight can help). Cover loosely with a lid or airlock and allow to ferment at room temperature for 1-4 weeks, until it reaches your desired tanginess.
- Honey Fermented Garlic: Another popular method involves submerging peeled garlic cloves in raw honey. The garlic and honey slowly ferment over weeks, creating a delicious, syrupy condiment that's great for sore throats or adding to savory dishes.
- Storage: Once fermented to your liking, store fermented garlic in the refrigerator to slow down the fermentation process.
For more ideas and detailed instructions on these diverse methods, be sure to read our comprehensive guide on the Best Ways to Preserve Garlic for Winter Freshness.
Common Pitfalls and How to Avoid Them
Even with the best intentions, mistakes can happen when preserving garlic. Being aware of common pitfalls can save your precious bulbs and ensure food safety.
- Refrigerating Whole Garlic: As mentioned, storing whole, uncured garlic bulbs in the refrigerator can actually encourage sprouting and mold growth due to the cool, humid environment. Stick to pantry storage for whole bulbs.
- Garlic in Oil at Room Temperature: This is arguably the most critical safety warning. Garlic stored in oil at room temperature creates an anaerobic (oxygen-free) environment, which is ideal for the growth of Clostridium botulinum, the bacteria that produces the deadly botulism toxin. Never store homemade garlic-in-oil mixtures at room temperature. Always keep them refrigerated and use within a few days, or freeze them for longer storage. Commercial garlic-in-oil products typically contain acidifiers and preservatives to prevent this risk.
- Lack of Air Circulation: Storing garlic in plastic bags or airtight containers encourages moisture buildup, leading to mold and rot. Always use breathable containers for traditional storage.
- Using Damaged or Compromised Bulbs: Any soft spots, cuts, or mold on a bulb can quickly spread to others. Always discard or immediately use any damaged garlic before storing the rest.
- Improper Curing: If you're growing your own, skipping or improperly executing the curing process will significantly shorten the shelf life of your garlic, making it prone to spoilage.
Mastering the art of preserving garlic for winter opens up a world of culinary possibilities, ensuring you never run out of this essential ingredient. By selecting quality bulbs, understanding the importance of proper curing, and utilizing methods like traditional storage, freezing, dehydrating, pickling, or fermenting, you can enjoy the robust flavor of garlic throughout the year. Not only does this reduce food waste and save money, but it also provides the satisfaction of a well-stocked pantry. Experiment with different techniques to find what works best for your lifestyle and culinary preferences, and savor the rich taste of fresh-tasting garlic in every dish, all winter long.
